Playwright and TypeScript: Get Started with the Best Automation Framework!
In the current world of web development and software testing, automated testing frameworks have emerged as invaluable tools. They help organizations ensure that their applications function correctly and reliably across different platforms and across multiple versions. Playwright is one such automation tool that is getting more and more dominant in the current market due to its speed, effectiveness, and developer-friendliness.
In this article, I will dive into the world of Playwright, defining it, exploring it, and exposing its advantages over its competitors.
I will ensure that this article helps you set up a test automation suite from beginning to end without needing to have specific previous knowledge.
For those looking to dive deeper into Playwright, we have an Awesome Course that will provide everything you need to develop your own automation framework!
Pre-requisites:
- No prior knowledge required, only eagerness to learn ;)
What is Playwright?

Origin and Development
Microsoft Playwright was released in 2011 as an open-source project built on top of Puppeteer (a Node.js library that provides an API to control Chrome). It has quickly gained popularity due to its innovative features that enable to test modern web applications.
You can find the release history in playwright team official GitHub Repository.
Core Functionality
-
Cross-language: Playwright is by default a JavaScript-based framework. However, they expanded their support to multiple languages such as TypeScript, Java, Python, and .NET, therefore making it is to pick up in all teams.
-
Cross-browser and cross-platform: Playwright can be run on Windows, Linux, and macOS, either locally or on a CI, and across all major browsers including Chrome, Firefox, Safari, etc. both in UI or Headless mode (without displaying the UI, great for CI/CD) !
-
Test Mobile Web: It can run on the native mobile emulator in Chrome or Safari to simulate the mobile behavior.
-
Auto-waits: Playwright implements a feature called auto-waits. In short, you don't need to wait for elements to show up before performing actions, it waits automatically for each element. You just have a set a timeout.
-
Supports for iFrame and Shadow DOM: Unlike other frameworks, you won't have a hard time running your tests in iFrames and Shadow Doms, test scripts run seamlessly without any problem.
-
Dynamic Web Assertions: When it comes to Assertions, Playwright retries the checks automatically until the required condition is met (or your timeout is spent), and when you have a test failure, it provides screenshots and videos to help you trace each fail.
-
Test isolation: The playwright framework creates a browser context for each new test. A browser context means that each playwright test opens a brand-new browser (no cookies, no profile), which ensures full test isolation with zero overhead.
Why Choose Playwright for Test Automation?
Setting Up Your Playwright Environment
Installation and configuration steps
Before we can start using Playwright with TypeScript, a bit of installation is required in order to set up our development environments.
Node.js:
First, we need to have Node.js installed.
To check if you have it already installed, open your command line and run "node -v", a version should appear.
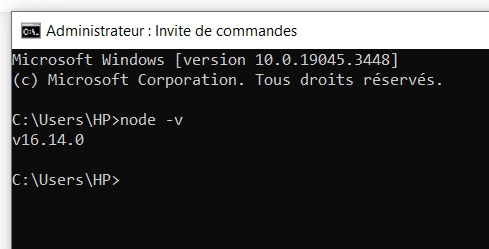
If not, then you have to install Node.js, check the official site for that.
Code Editor:
I recommend having VS Code (Visual Studio Code) installed since it is lightweight and provides really useful extensions for Playwright and Typescript, but any IDE should be fine.
Playwright:
Now there are a few steps we need to take to install Playwright:
- Create a new directory for our project
- Run "npm init playwright@latest" You will be prompted to choose between JavaScript and TypeScript (Thou shall choose the latest ;) ).
It will then prompt you to install browsers which you will say YES so it installs multiple browsers needed for your tests.
Here's what you should see:
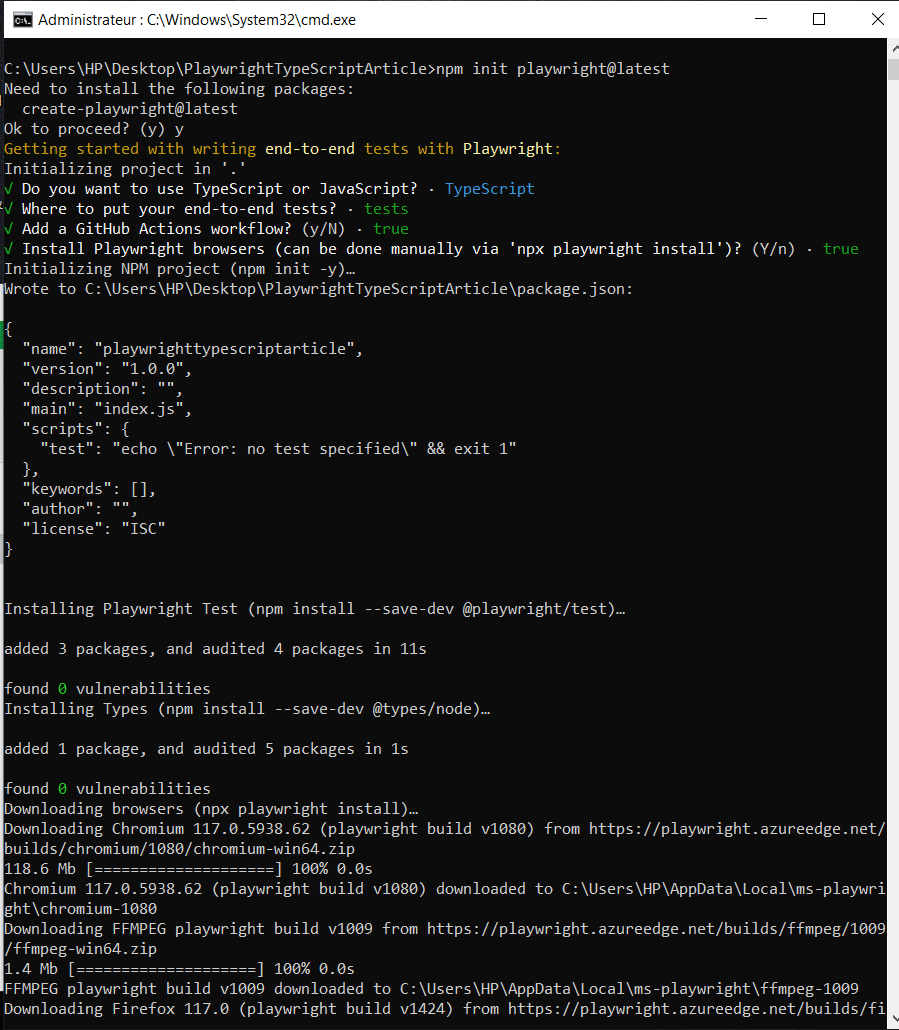
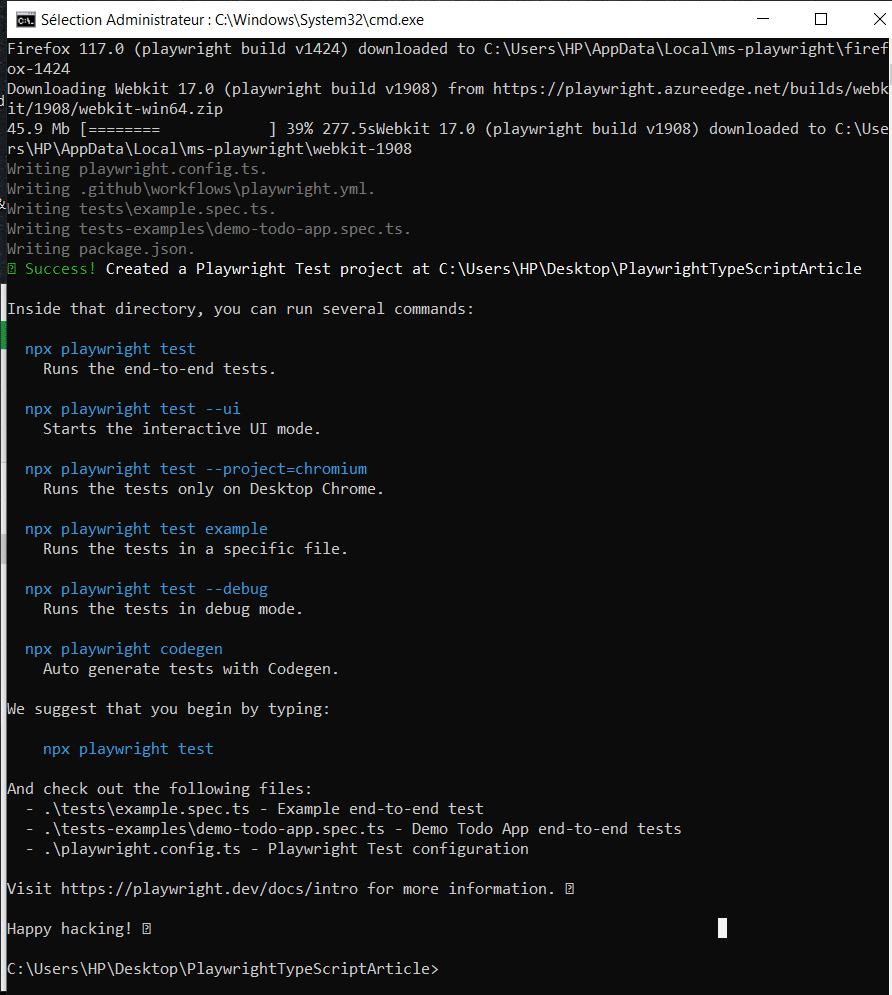
If you have the same output, then congrats! Your Playwright project is up and running!
Writing Your First Playwright Test
Basic Test Structure
Once you open your Playwright project in your favorite IDE (for me its Visual Studio Code), you should see something like this: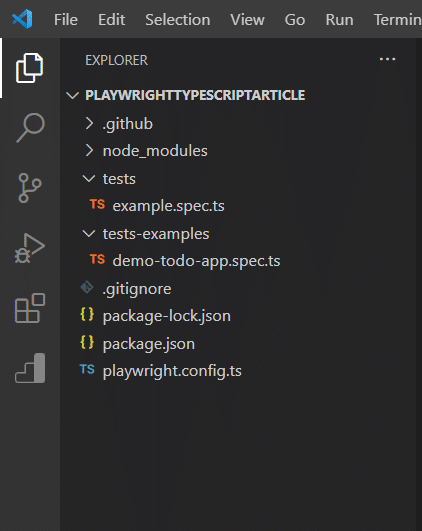
The ".github" folder is about CI/CD, so it is not important for us, you can ignore it for now.
You can see the "example.spec.ts" file which is an auto-generated file by Playwright that shows basic usage.
Running Playwright tests
We can start by running the following command:

This will open Playwright test runner in UI-MODE, you should see the following:
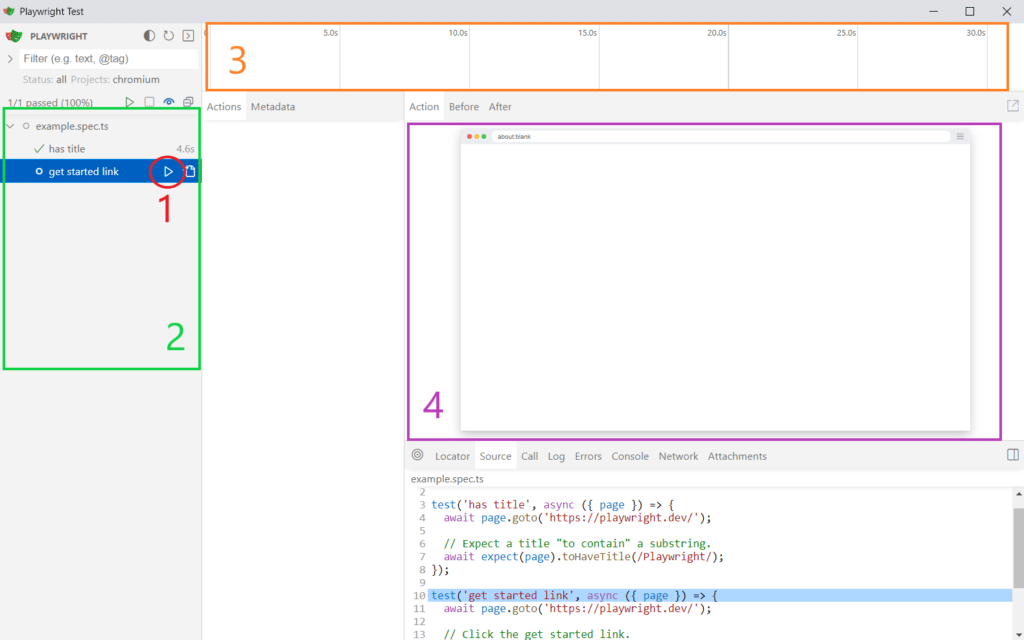
You can see there's a bunch of components here, let's dissect each one:
1- This icon lets you run playwright tests that you defined in your spec file, we already have 2 tests as you can see.
2- Here you will see all the tests and all the spec files you have in your project.
3- Here is the timeline that you can use to go back and forth in time when you run tests.
4- That is the main Interface. Here you will all the actions done when you run tests. You will see the browser opening and running tests.
Now, let's run our Playwright tests!
Click on the run icon beside our example.spec.ts and you will see our tests running!
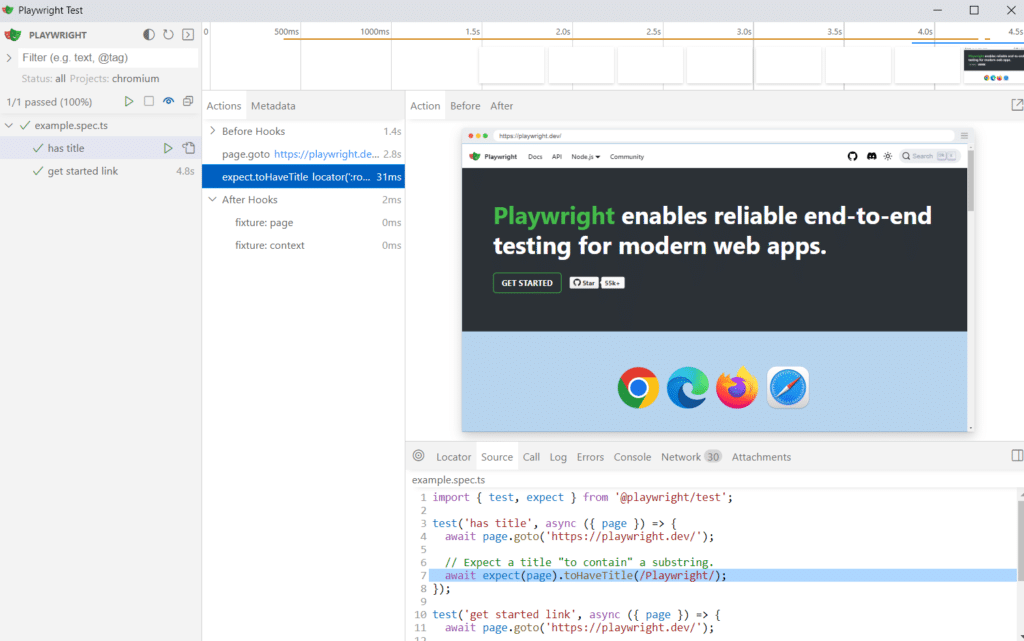
You can see that our main Interface now shows the browser running our Playwright tests. Using the timeline you go can back in time to see the state of your web apps in a Snapshot.
You can also check different steps of the test execution and click on each step to see the state of the app. In the Metadata tab, you can see some information like the browser (here we can see that we are running our Playwright test in Chromium), the duration, the viewport, etc.
Try playing with the UI a bit and gettingt around it. Don't be scared to click everywhere ;)
Writing Assertions in a Playwright Test
Let's go back to our IDE. Open the "tests" folder and create a new file "playwright-test .spec.ts", and add the import at the beginning of the file.
Now, we will do something interesting. As I believe it is best to learn by practice, we will do a quick exercise together. Let's automate the following test scenario in Playwright!
Real-world test automation
Scenario: Checking that the courses page is functional
Test steps:
- Navigate to the SDETUnicorns home page
- Click on the courses menu
- Check that we are indeed on the "Courses" page
- Check that the header links are present
- Check that we can access the academy
- Check that the courses are visible
Let's automate all the tests listed above in Playwright!
General outline:
First, let's see the general outline of our Playwright test script:
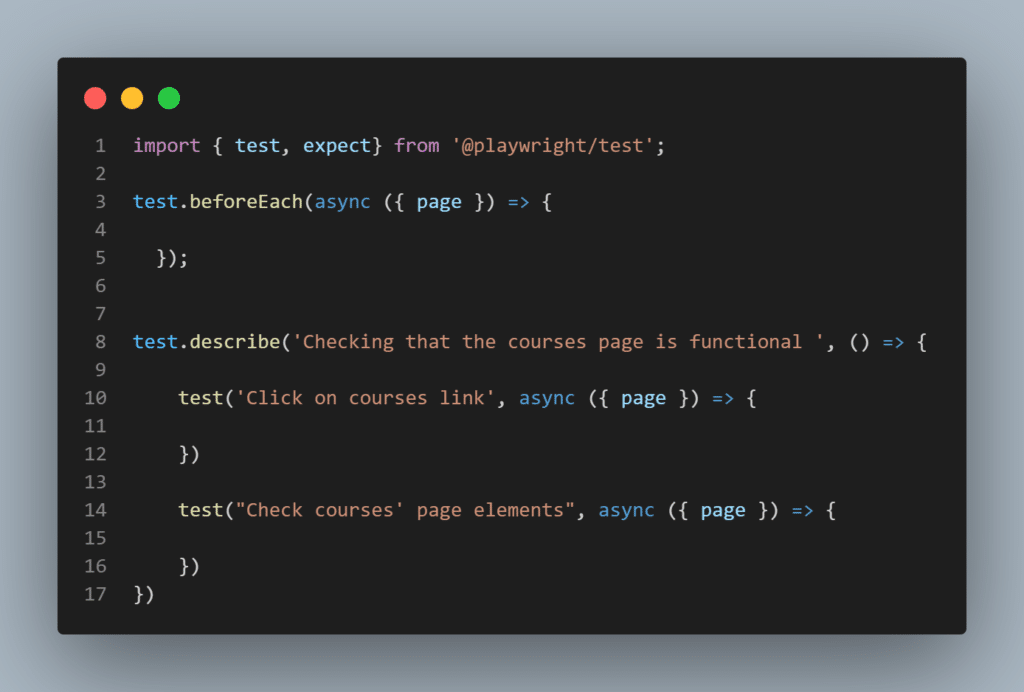
- At line 3, we can a function called "beforeEach()", that is called a hook. As its name suggests, it is executed before each test run. It takes an asynchronous function as an argument which "page" refers to our applications's page. There are other hooks like "afterEach()" that executes after each test, and "afterAll()" that executes once after all tests.
- At line 8 we can see the "describe" function. It refers to our test scenario. Each group of test cases that have the same context should be grouped in the same "describe" block.
- Lines 10 and 14 are our test cases. As you can see, they are in the same "describe" block and you can have as many as you want. They take as parameters the test case's title and an asynchronous function.
That is our outline to get started. As you see everything is empty. Let's start writing our Playwright test script now!
Deep in Test Automation!
- The "beforeEach" hook should always contain actions that need to be done before each test, like Navigating to our main page!
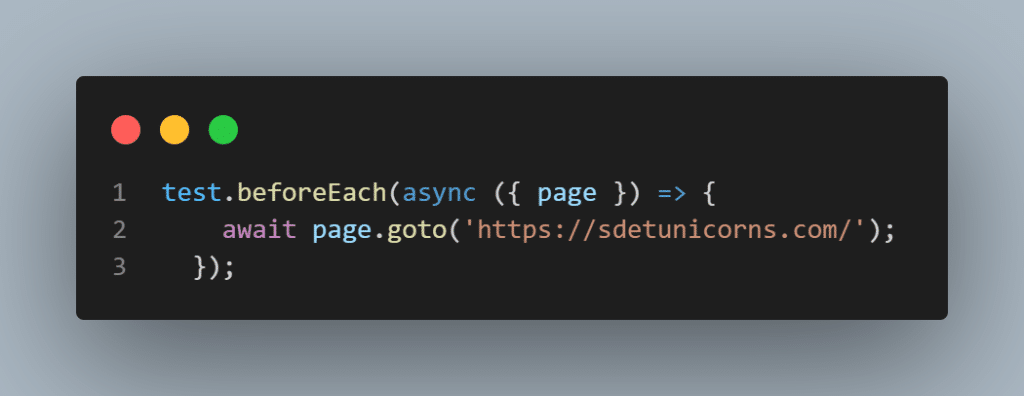
I think the command is pretty self-explanatory.
Before each test, we are waiting for the page to access "https://sdetunicorns.com/"
You can open Playwright UI-MODE using the above command and run the tests. You will see that they both pass as all they do is navigate to the specified URL.
- For our first test, we need to get the "Courses" link, click on it, and check that we are on the correct page.
To get an element's HTML properties you can hover over it and right-click => Inspect
To get an element using a locator in Playwright we use "page.locator()"
To get an element by role in Playwright we use "getByRole()"
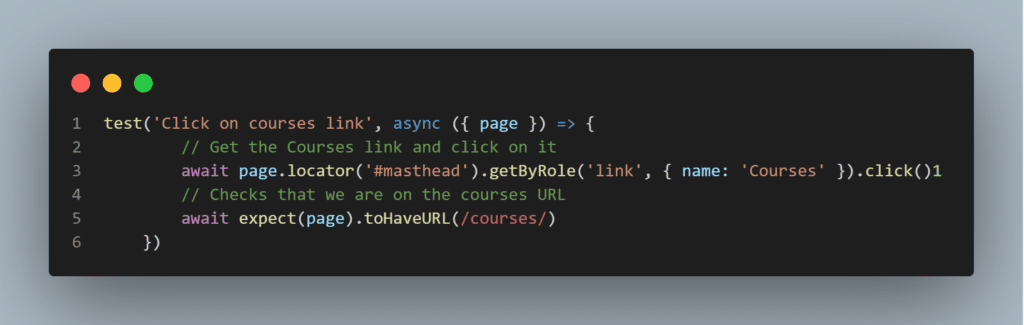
Let's explain what we did here:
- Get the element that has the HTML ID="masthead". This element is the whole Header of the page. We did this to limit our next command.
- In the Header that we just returned we are locating a "link" (anchor tag) that has the text "Courses"
- We click on that link!
- We then use an Assertion. Basically, we expect the current page to have a URL that contains "courses" (Regular expression ;) ).
Go ahead, run the test,and see the results!
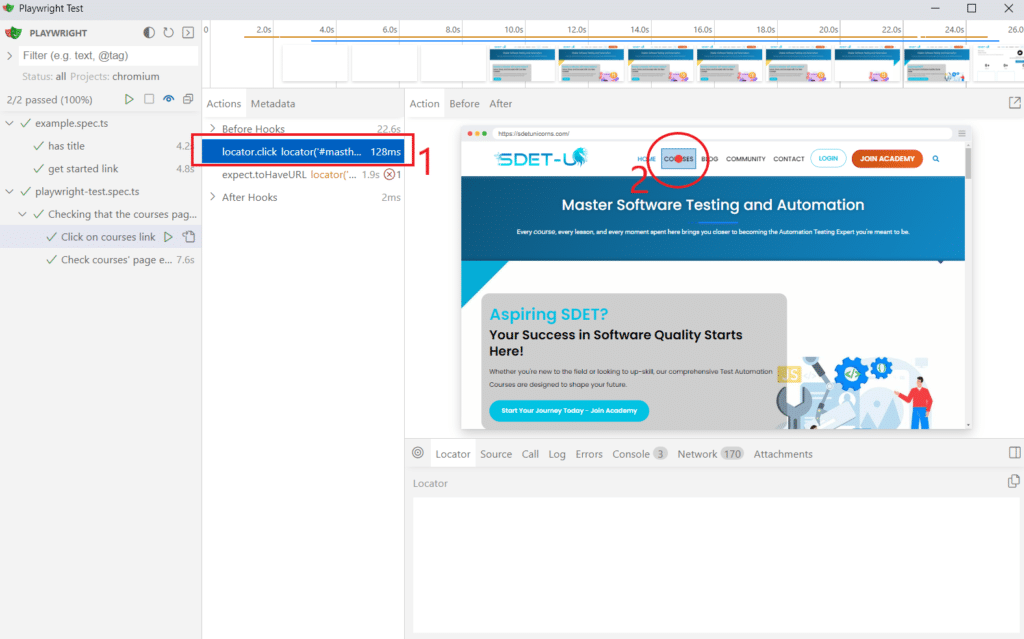
You can see that our test passed, and if you click on 1 you will see that it gets the correct element 2!
- For our second test we will do 4 main things:
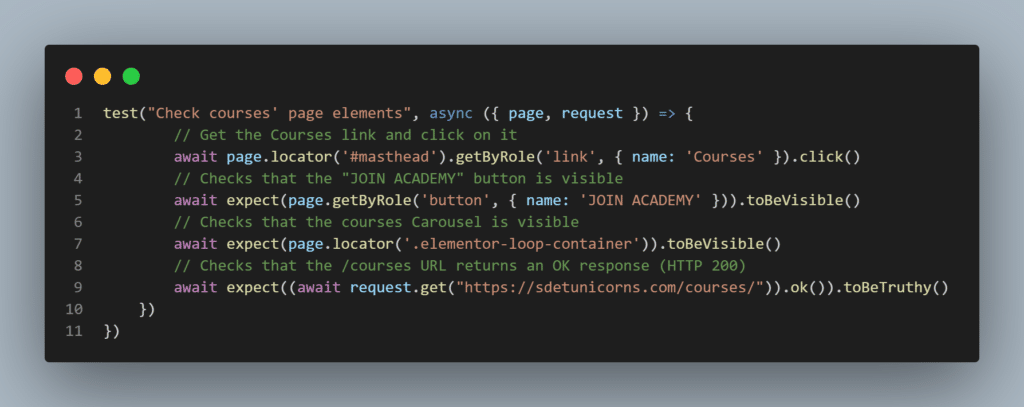
1- Just like in the previous test, we click on the "courses" link.
2- We are checking that the button with the text "JOIN ACADEMY" is visible. 3- We check that the "Courses" listing (or carousel) is visible
4- We are asserting that the /courses url return an HTTP code 200.
For this, we are using the "request.get()" function. It enables us to do API testing in Playwright.
Playwright offers other functions for API testing like: "request.post()" and "request.put()".
You can run the test and see the result in Playwright UI-MODE!
Quick Exercise:
You turn to exercise!
Here's a scenario for you to automate in Playwright:
- Check that the /blog page is accessible and functional
- Check that this current article is accessible
- Check that the FAQ and comment section are visible.
Conclusion
To wrap it up, after having a look at what Playwright has to offer in terms of functionalities, innovativity, and ease of use, I'm sure you have grasped how greatly it will benefit your testing flow and help you write tests that cover most of the test scenarios.
Combined with TypeScript, it offers a powerful and flexible framework that enables you to create and develop maintainable and highly reliable automated tests for your web application (and even simulating mobile behavior!).
By following the right practices, implementing the steps outlined in this article, and having the right tools in place (I'm talking about you CI/CD -_- ), you will have the power to enhance the whole flow of testing in your organization while reducing costs and ensuring the best software is shipped to end users!
If you want to dive deeper into the world of Playwright, don't miss out on our course as it dives really deep and will make of you an expert Playwright automation engineer!
Happy Testing!
See you in the next one!
References
What is Playwright used for?
Playwright is used to automate test execution in modern browsers. A Playwright test can implement UI testing, API testing, or mobile testing. Playwright also has the ability to run parallel tests while supporting multiple programming languages and multiple web browsers.
Is Playwright worth learning?
Since it has emerged, Playwright has kept gaining popularity, while the demand for Playwright Testing keeps increasing, so YES it is definitely worth learning and mastering.
What is the state of Playwright in 2023?
Playwright keeps getting more and more traction. In 2023 it is one of the best test automation frameworks out there! It greatly facilitates web testing while ensuring running tests in a fast yet reliable fashion!
Is Playwright the best Automation Framework ?
As of 2023, the Podium of the most popular framework is shared between Cypress, Selenium, and Playwright. However, the QA Community agrees that you should go with Playwright!
What is the difference between Cypress and Playwright?
Both Cypress and Playwright are GREAT automation frameworks. However, their are some architectural differences like Cypress being a JavaScript/TypeScript only framework and the impossibility of running tests in parallel without paying for their SAAS product.
Does Playwright use JavaScript or TypeScript?
Playwright supports both JavaScript and TypeScript. You should go with the one you’re most familiar with, or, if you want type safety go with TypeScript.
What is the best language to use for Playwright?
Playwright supports a variety of languages such as: JavaScript, TypeScript, Java, Python, etc. The best language being the one you and your team are most familiar with. However since it is designed to be a JavaScript framework, you will see that some functionalities work best using JavaScript/TypeScript.
Does Playwright support cross-browser testing?
Playwright supports cross-browser testing and cross-browser automation out of the box!
Want to learn more?
Check out our courses to master test automation and advance your career.
Explore Courses